
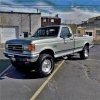

IT happens to almost everyone's vehicle, UV damage on the headlight lenses. This UV damage fogs the lens and makes your ability to see at night limited. To fix this you can go to your local automotive store ant buy a restoration kit. Recently I buffed my headlights using a 3M kit that I bought from Wal-mart for $19. In this Article I'm using my 1989 Ford Bronco but this kit works on any vehicle. I hope to add further explanation to the included instructions so that YOU (the reader) can be better informed.
Tools you will need:
- Corded Drill (You can use a cordless one if you have lots of batterys)
- Painters Tape
- Rags
- Spray bottle with water

Using this Kit (and ones like it) is simple. If this is your first time restoring any headlight, this process will take you about an hour and fifteen.
To get started tape up the area around your headlights.

You will want to tuck the tape between the trim and the headlight. This insures that the tape won't fall off as your working. You will also want to use two layers of tape in the corners and on grill side of the light because I found that the sand paper tended to ware through these zones.
Start with the Step one Sand paper. (500 Grit) And go over the entire lens.
**Note: Sand and buff around the nubs on the lens. taking the spinning pad to these will likely destroy the pad.

It will look worse then before but things only get better from here on out. This step took me 2 pads per headlight lens. Just make sure to keep your pressure even and give each spot the same amount of spin time. If you aren't careful you can create un-even-ness in the lens during this step.
Use your Rag and wipe the dust off the lens when before going on to the next step.
**Note: I know that the directions included say to only do one lens at a time but is is easier to do both at the same time.
Proceed to use the Step 2 Sand paper.

This white paper has a much finer grit and will lessen the deep scratches making the headlight appear clearer. Use 2 pads per light as you only get 4 in the kit.
Wipe the lens using your rage to get the dust off.
Switch out the wasted step 2 sand paper for the step 3 (3000 grit) pad.

This is where your spry bottle is needed. You have to keep both the headlight lens and the pad wet. If either get dry, the 3000 grit pad will burn up and leave junk on the lens. The only way to get the junk off start over with another kit. Just remember to take your time and allow the spinning action to work more then the pressure on the pad.
After you feel that you have gone over the headlight thoroughly you can then use the Step 4 Sponge pad and compound.
I like to spread the compound on the entire lens using my finger and then using the sponge to buff the surface.
**Note: If you put the compound on the sponge pad. It will around and make a bigger mess then needs be.
**Note: Buff around the nubs on the lens. taking the spinning pad to these will destroy the sponge pad.
I did this twice per side just for the nice "new" feeling.

After everything is done remove the tape and use the hose to spry off the compound splashes.
**Note: Even better... Go to a car wash. The splatter will cause dots to show for quite a while if left unattended.
Remember, this Article is to provide further explanation to the instructions provided in the kit.
Questions? Comments? Post them up!


